
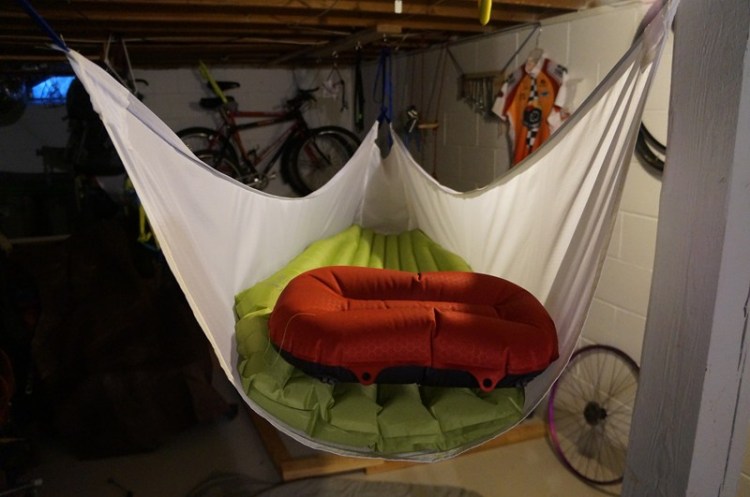
You better not assume this is just an ordinary bridge hammock.
http://www.youtube.com/watch?v=wGpiiSPoW20
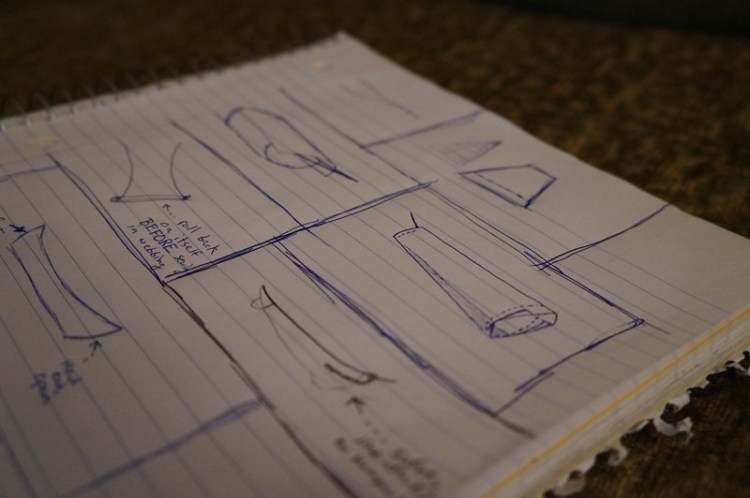
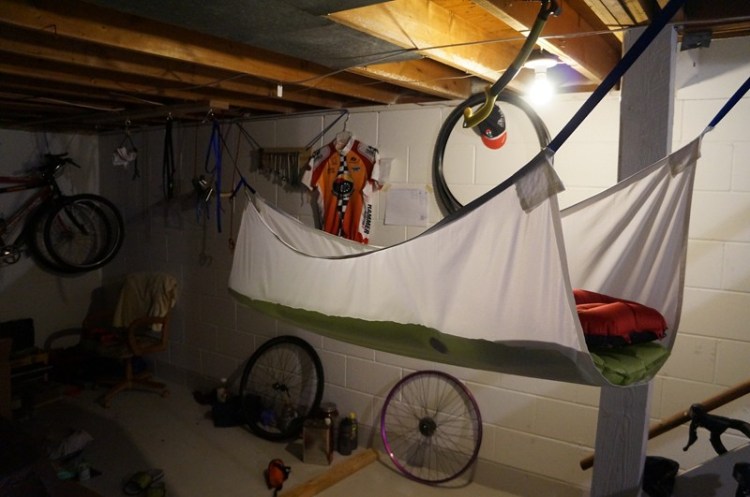
Version 6.0 was supposed to be a replica of my purple double layer bridge hammock (Check out v5.0) with just one small tweak. But I decided to get crazy and start from the beginning! I have had a hammock/tarp concept in my head since the first day I started tree climbing and this idea has evolved with every trip into the canopy. Seriously, I have tons of doodles laying around my house waiting patiently for transformation.
The concept revolves around building an ultralight hammock/tarp system from the ground up (haha, get it?) specifically for treecamping. I know you are thinking “a 15 ounce hammock is NOT ultra light!” but allow me to explain. This hammock is part of a system that gets rid of many other pieces of gear that are usually required for treecamping. I will not be debuting the entire system until my tarp is completed so for now, just understand that this hammock is just one building block to an ultralight gear system.
Material Prices:
9 feet of 1.9 ounce ripstop nylon from Hancock – $12.50 with coupon
42 feet of 9/16″ climbing spec webbing from REI – $13.10
2 spools of thread – $4.00
Work – 4 hours
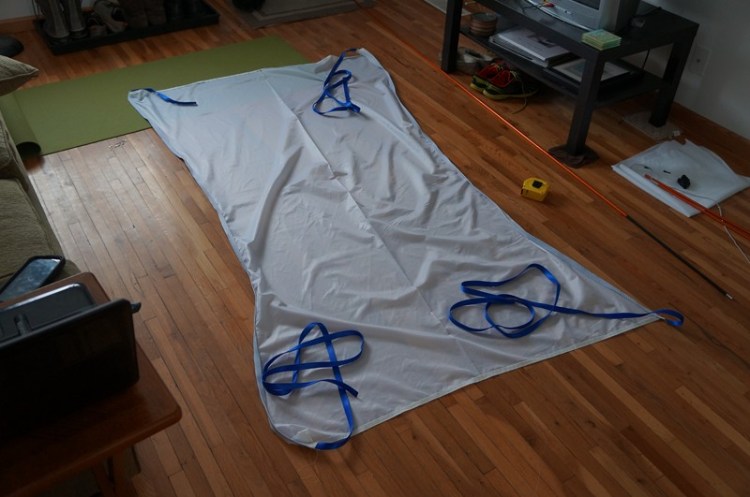
Finished hammock specs:
79″ long
38″ wide at the middle (when laid flat)
50″ wide at head and foot (when laid flat)
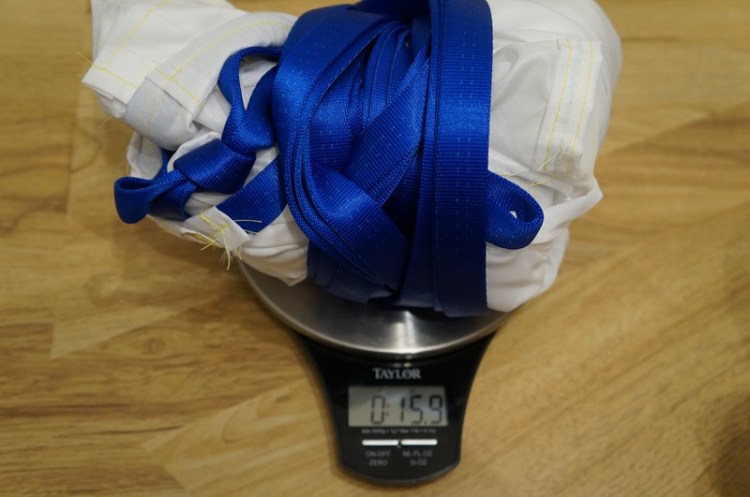
15.9 ounces
Nylon material lengths before sewing:
79″ long plus an extra 4″ for hems means 83″ total length.
50″ wide plus an extra 3″ for hems means 53″ but after folding the material in half in order to cut a symmetrical curve on both sides the measured width is 26.5″.
Depth of the curve is 6″ at the midline.
Right side wedding length:
TOTAL right side length is 264″
80″ for tying head end to a tree.
14″ for tying safety line anchor point.
80″ in hammock hem.
90″ for tying foot end to a tree.
Left side webbing length:
TOTAL left side length is 172″
78″ for tying head end to tree.
80″ in hammock hem.
14″ for knot at foot end.
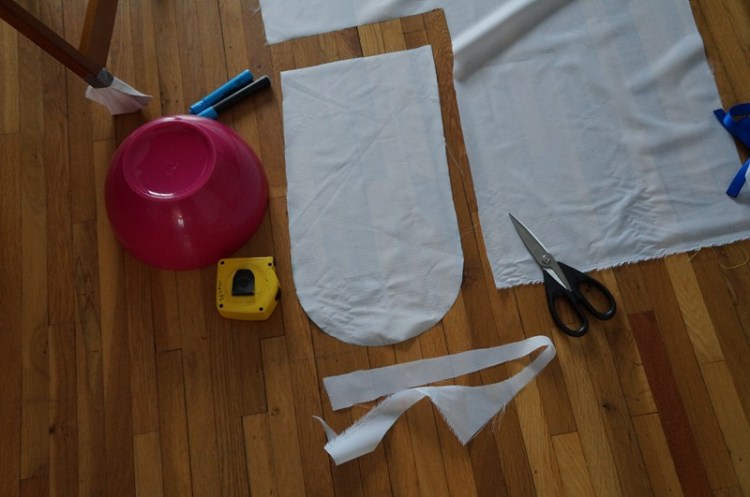
1. Lay out your nylon and cut it to your chosen length (don’t forget to account for your hems).
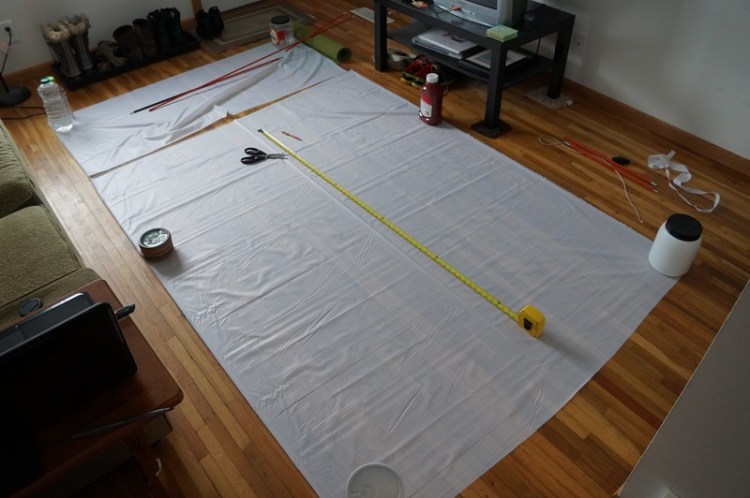
2. Fold your sheet lengthwise. (Why? It allows you to cut the curve on both sides at the same time. This means both curves will be identical.)
3. Make your material taught by either pinning it to the carpet or using weights on each corner.
4. Measure out 26.5″ from the folded edge at the foot end and head end. Make an “x”.
5. Measure out 20.5″ from the folded edge at the center and mark a “o”.
6. Use a tent pole to draw the curve. Place the pole on your material so that it intersects the “x” and bends down to the “o” then back up to the second “x”.
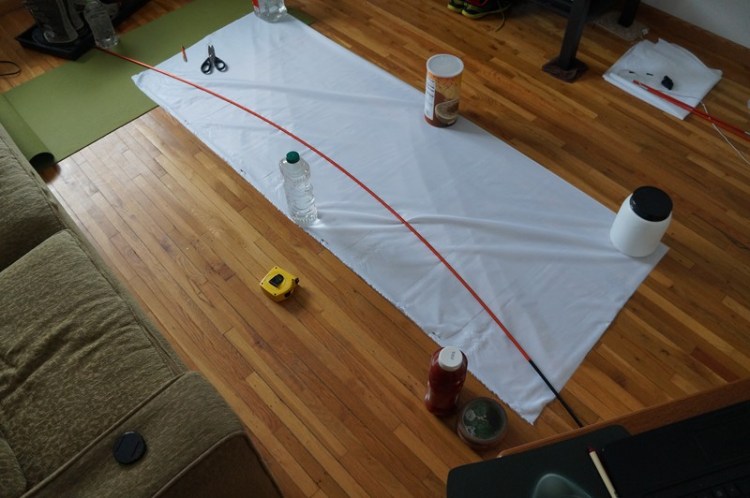
7. Cut the curve.
8. Hem the head and foot end by rolling it and sewing it.
9. Cut two lengths of webbing.
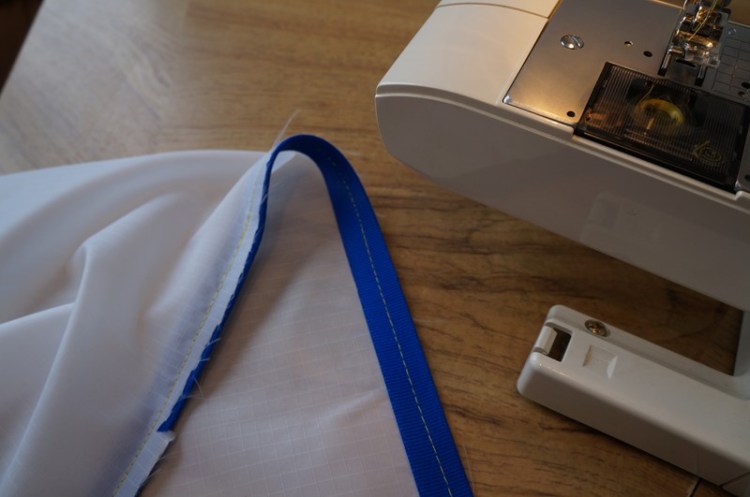
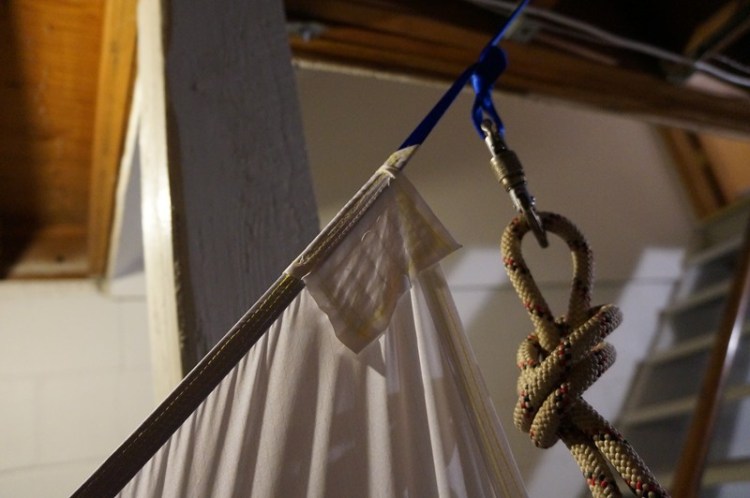
10. Pin the webbing to the edge of your curve making sure that you have at least six feet of webbing protruding from three corners and at least 14″ protruding from the fourth. (Pinning it is optional, I just hold mine in place while sewing)
11. Sew the webbing to your nylon. Tip: backup your stitch every foot in case a thread gets snagged during your adventures.
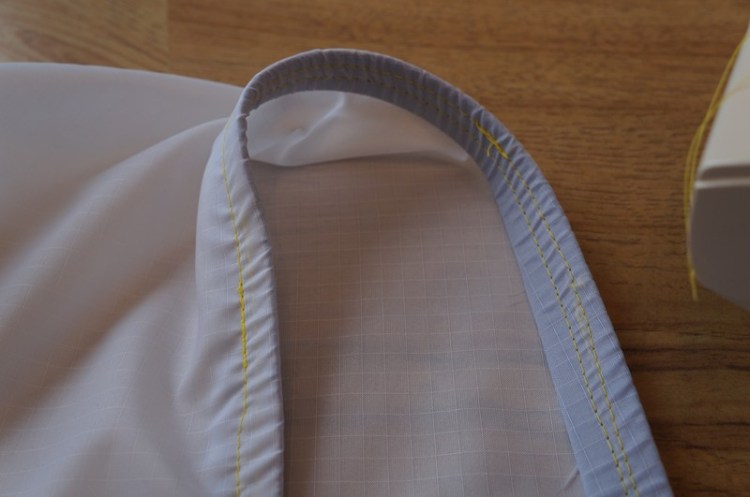
12. Roll the webbing once into your material. Make sure it is tightly rolled and sew again.
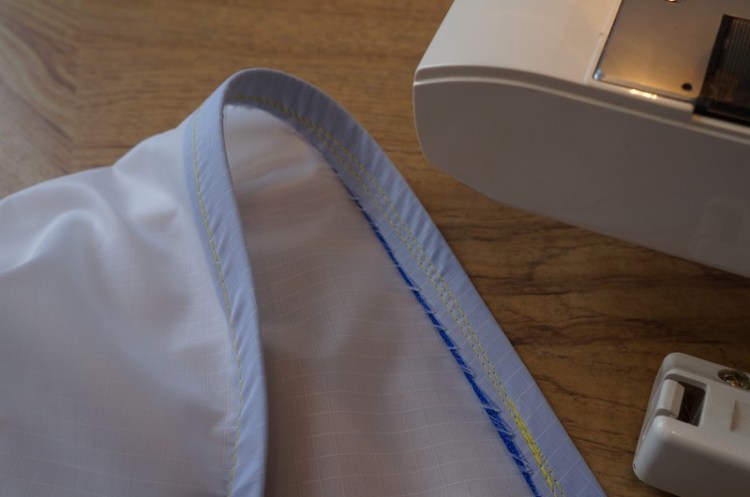
13. Tightly roll the webbing one more time and sew again.
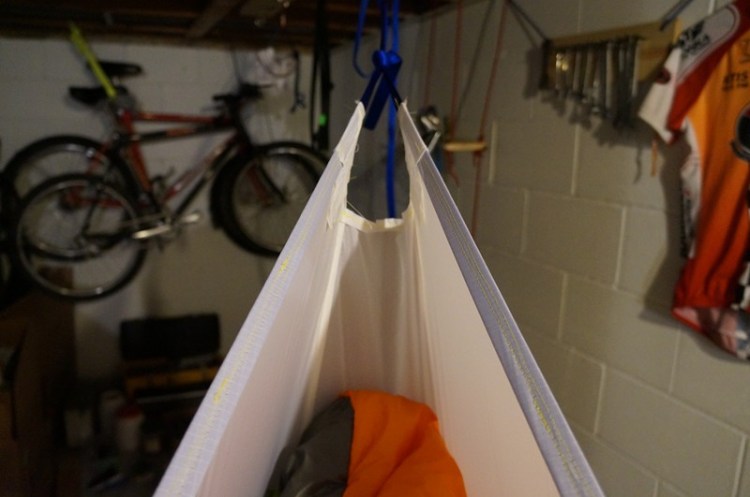
14. DONE! Go test it out!
…the following steps are not required but are definitely worth the time and effort.
15. Cut out a footbox. I used a big bowl to draw the curve and I used a height of 20 inches high. I like having a foot box so I can throw snacks down there without worrying about them falling.
16. Roll your nylon cutout into the foot end and sew.
17. Cut out four rectangles from your material. My rectangles measure six inches long and three inches wide. These will be used for strengthening the stitches on your hammock’s corners
18. Place them over each corner and sew into place.
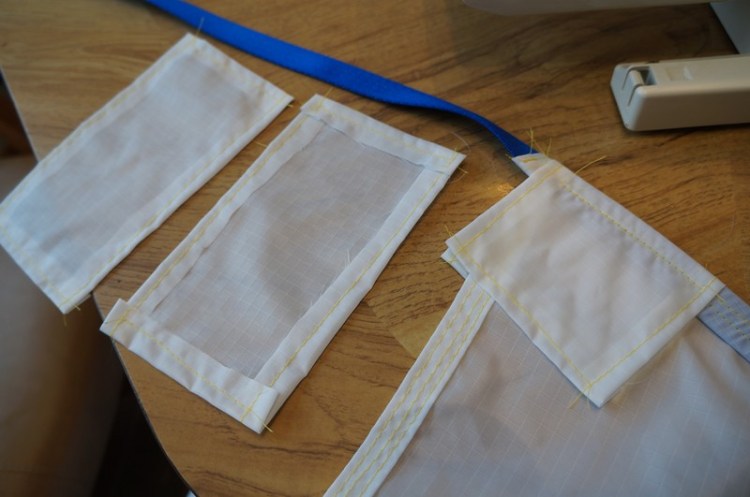
19. Sew six vertical AND horizontal stiches across these pieces of material. This will greatly displace the amount of weight on each specific seam.
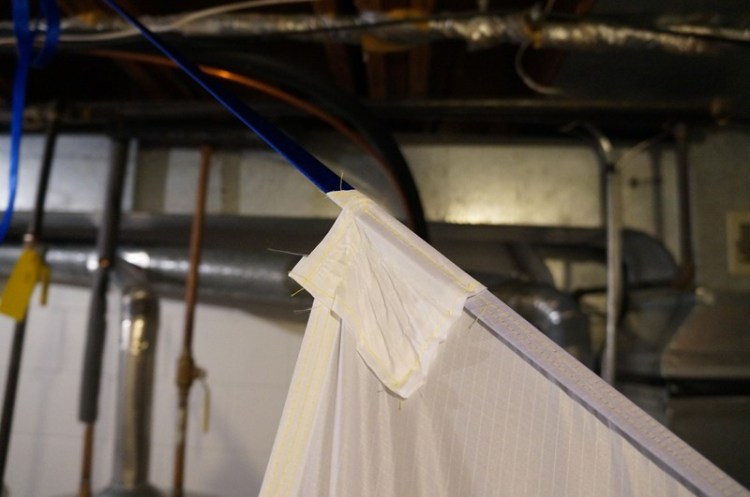
20. Now you are really done!
Tags: TREEfool hammock tutorial diy hammock tutorial bridge hammock tutorial bridge hammock v6.0 canopy camping hammock build a bridge hammock do it yourself hammock cheap hammock how to make a bridge hammock

Awesome hammock. How is the sag? I suppose if you string it tighter, it would bow up in the middle that then your weight would make even? I’m ready to make my own like this..
Gabe
The catenary cut is what prevents the middle from sagging. When it is strung tight the middle of the hammock lifts up until I lay down in it then it evens out to a flat lay.
Awesome, exactly what I imagined.
Nice hammock 😉
I wonder if it would be possible to tie off to a single point on both ends and use a trekking pole at the head as a spreader bar?
Great idea! I am sure it would work. However, I use three anchor points because this makes the hammock stable (impossible to tip) which is very comforting on a windy night.
OK…so this is totally what I’m looking for…I think. We’re kayak camping and last year I tried a regular hammock…couldn’t sleep in it…I sleep on my side mostly or stomach…and the regular hammock just wasn’t comfortable. Before I take on your rendition of a bridge hammock what are your thoughts on it now that you’ve used it? a few times? Are you flat or close to flat? Would you make any other modifications or think it’s good the way it is?
Thanks!
Nathan
Hey Nathan I am glad you asked. I loved hammocks because they allowed me to sleep high in the tree canopy. But when sleeping close to the ground (camping with friends) I realized that I always chose a sleeping pad over a hammock. The problem with gathered end hammocks is even sleeping on the diagonal it still sucks for side sleepers and with a bridge hammock the problem is that it squeezes you. HOWEVER!!!!! I recently built up a bridge hammock which is open on both ends and used a roughly 4 foot spreader bar at each end. It was PERFECT! I could easily lay on my side or back without any weird bending or squeezing. You can order aluminum tubes for the spreader bars at onlinemetals.com. I plan on building one like this in the near future but life is overbooked right now!
Thanks for the input and reply! I am using your info to make one up now…and I think I am also going to try to add some material to the head end…I could see my pillow falling out pretty easy…and will see if I need the spreader or just wide enough anchor points at the head end. Peace!
I tie a 2mm cord to my pillow with a small biner on the end to attach the pillow to the hammock. There has been so many times when my pillow is suddenly gone and I find it free hanging under my hammock/portaledge which would have ended with me climbing down to the ground to retrieve it had I not attached a string to it.
Thanks so much for your helpful video tutorial on the DIY bridge hammock. It’s been an inspiration to me and I hope to make something very similar. My intent is to make an indoor bridge hammock based on your design. I’ve created a thread about that at ]https://www.hammockforums.net/forum/showthread.php/114748-DIY-bridged-hammock-for-full-time-hammock-sleeping and I would be most appreciative of any input you might offer there. Thanks
Hi I was wondering for this hammock do you use two layers of the fabric or only one and secondly what type of tread do you use when you sew the fabric to the webbing. I just don’t want to use a wrong one and have my hammock fall apart in the middle of the night
For this specific hammock I only used 1 layer of ripstop nylon. But I only weigh 165lbs. I just used regular polyester thread from JoAnn fabrics and then triple stitched every seem for durability (since my machine doesn’t work well with heavy threads). As long as the corners are reinforced it shouldn’t be much of a problem since the weight is stretch out over hundreds of stitches.
Ok thank you very much and one last question if you don’t have a sewing machine what would the next best option be
Hi. I was wondering if you were to make one for me and then sell it with the rain tarp. How much would you say it’s cost??
To be honest, this rain tarp has a few issues which is why I converted it into a pyramid tarp for my portaledge. This tarp really only works for traditional gathered end hammocks and making a tarp without the hammock would be quite difficult. I would love to help you out but the price would be too steep for you and I am unwilling to commit so much time to a project that might not fit your hammock (thus making me feel obliged to refund your money and waste a whole bunch of my very rare freetime that I currently have). Ask on hammockforums for some DIYer’s and provide the pictures that I have in this post. You will likely get someone who is willing to build it.
Alright, So I’m thinking about doing a mix between your bridge hammock and the Treeboat. I want to do your design but widen the foot box, add a even wider head box, and add spreader bar(s). I would prefer it a little wider than deeper but I still want a pocket to lay in. I realize the spreader bar is probably unnecessary but I think it will add versatility for two point rigging situations. I’m also thinking about adding webbing pockets for tent pole arches over the top to make a net and/or fly in the future. I also think I’m going to only extend the webbing 12″ past each corner and sew in an aluminum ring like on the tree bridge. I intend to make up the difference my tethers. Again, with the intent of adding versatility and additional stabilizing points by adding the rings. I am curious of your thoughts. I would hate to add a weakness.
If you are worried about creating a weakness with the rings just tie a waterknot instead of sewing a ring in. I love your idea. Wider = more comfortable. I tested some VERY wide poles on my bridge hammock and it just got more comfortable the further I extended the poles. Your entire plan is something that I wanted to see done because I think it will be the best balance of comfort, lightweight, rig-ability, and shelter-ability.
I love your projects. Did the nylon webbing work well in this hammock? Was there any noticeable stretch over time? I am debating using climbing spec nylon vs tubular polyester.
It worked perfectly fine! I hang my hammocks on an 11mm static ridgeline with adjustable prusiks so it isn’t noticeable at all.