
A blue plastic tarp and some ripstop nylon is all you need for an overnight adventure into the tree canopy! When I am standing on a branch looking at the 70 foot gap between me and the ground the last thing I want to do is…
DISCLAIMER: I am posting this for historical purposes. I created this hammock a few years ago and have since learned many things to do and not do. One specific thing you should NOT DO is use paracord for prusiks. Also, I am not responsible for any injuries or death that occur from you using the tips in this post.
…jump around trying to figure out how to set up my tarp, so I usually don’t. However, tomorrow will be the first time I bivy in the treetops where I can’t just rappel to the ground and hike a half mile to my car so I decided to make a tarp that fits my unique needs when I am setting up my campsite in the tree canopy.
My Criteria:
1- Sleek design that will fit anywhere my hammock will.
2- No guy out points required because there are usually no anchor spots.
3- Allows easy hammock entry from any possible angle.
4- Cheap so if it gets destroyed during the climb I can make another.
5- Lightweight (duh!)
6- Does not get in the way of my climbing rope (my safety line!)
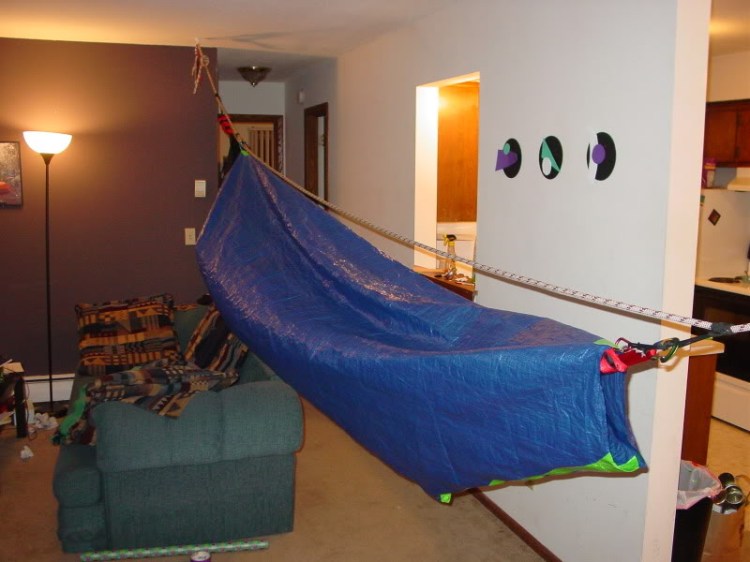
Here is what I came up with. It couldn’t possibly be easier to set up, just unpack and clip my hammock through it.


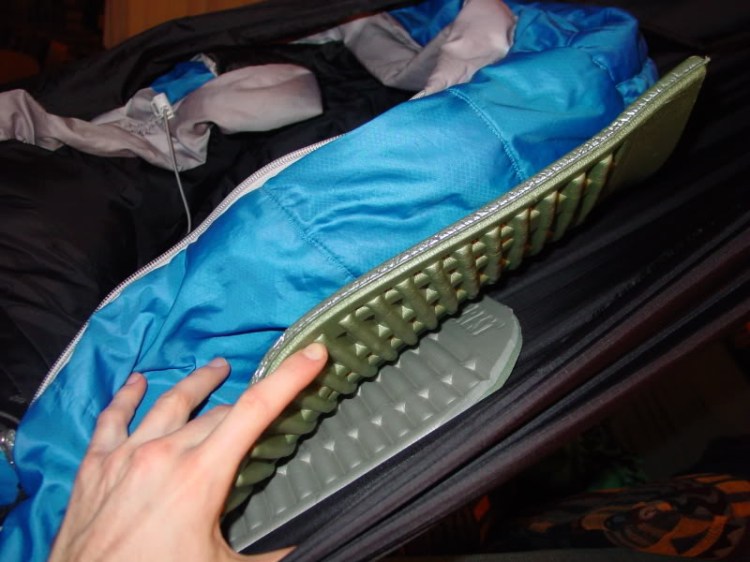
My winter insulation (1 xl ridgerest and 1 reg ridgrest for the core)
Here is a closeup for anyone curious as to how I hang my hammock. It is a prusik knot tied to each end of the hammock which allows my too tighten or loosen my hammock by simply sliding the knot back and forth on the ridgeline.

I am OK with a little snow getting into my hammock but if the temps rise and it starts raining I can go totally bombproof and zip my rain jacket over the opening (only problem at that point would be condensation).

The hammock itself cost me $13 and about 20 minutes to make if I remember correctly. I followed Hunabku’s tutorial. His original instructions were fantastic but the photos have all expired so I reposted them at the following link. CLICK HERE for the cheapest and easiest DIY hammock tutorial you will ever find. It doesn’t even require a sewing machine!
The tarp was made from a cheap blue poly tarp from Menards. I cut off the edges (which had heavy steel grommets) then made a cylinder out of it and taped the seem together with ductape. This is ridiculously easy to make and is super durable. I tried using the least amount of material possible so it tapers from the middle to the foot end.
The total amount that I have invested into my hammock, ridgeline, and tarp is about $30. What do you think of that! I will be making a few more of these for when my rock climbing buddies join me in the canopy. If you want to see pictures of this setup in action check back next week! Climb safe!
Tags: cheap hammock, hammock under $100, hammock under $50, hammock under $20, diy hammock, easy hammock, canopy camping , hammock camping
