
.
.
.
Topics Discussed On This Page
* Build a $20 tree camp worthy hammock
* Make your own tarp
* The cheapest rope ascension technique
* Where to buy cheap gear
.
.
.
Build a $20 Tree Camping Hammock
Originally I had provided a link with the EXACT SAME TUTORIAL listed below from the Canopy Chatter forums (original link: http://www.treeclimbercoalition.org/phpbb3/viewtopic.php?f=5&t=1430). However, the thread is so old that the photo links are broken so I am reposting the tutorial here to help spread the word of this awesome DIY hammock. The creator of the following tutorial is Hunabku and he deserves all of the credit:
Hunabku: “Here are some photos of the Hennessy Hammock clone that I came up with. It is designed to be used stand alone between to anchor points with the use of a ridge line. It can also be set up as shown by attaching it to an SRT traverse.
The hammock starts out as a 12′ X 5′ rectangle of fabric. I folded the edges and then wrapped them in polyester webbing before stitching them. I tested the hammock for strength without doing this and it is possible to make one without any sewing. I think the trim adds a lot of durability though.
Lay the fabric flat and then fold each side so that the two sides meet in the middle. Then, fold each side in half over and over until you get down to having each side about 1 1/2″ wide. Lay the two halves together and tie them in an overhand knot.
The next step is to rig the attachment loops. Begin with a piece of webbing about 4 feet long. Push a bight through the overhand knot in the hammock fabric from the inside of the hammock. This will be the rig loop for the hammock. Adjust the tails of the webbing so that one leg is about a foot long and the other leg is about 18″. Tie these in an overhand around the hammock fabric. Now tuck the longer tail back through both overhands to the outside of the hammock and tie it in a double fisherman’s knot. This creates the loop on the inside of the hammock for the ridge line attachments.
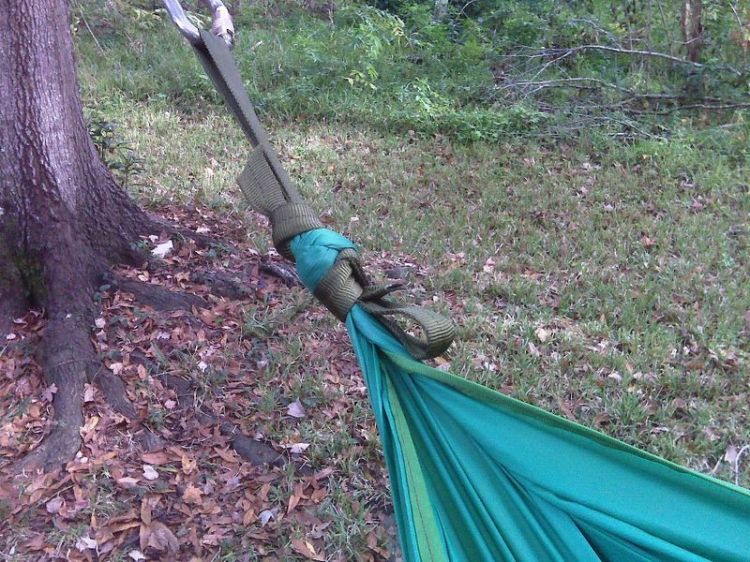
To make the attachments for the asymmetric spreader pole I started by cutting a piece of 1”tubular webbing about 6” long. I held one end open and sealed the edges with a lighter to make the opening for the pole. The other end will be sewn onto the hammock as seen in the photo below. To position these attachments find the center of the hammock. Measure 15” from center in opposite directions for each side of the hammock and mark those spots. I sewed the webbing on so that a pocket was formed so I could slide old fiberglass tent pole sections in them. This works pretty well but this is the first one I’ve made so I am sure I may refine this.
The finished product is an extremely comfortable hammock that allows a person to lay nearly flat. It is very lightweight, very affordable and very easy to make. I bought the fabric using a coupon that brought the price to $3.50 per yard. The webbing for the edges cost about $4.00. Tubular webbing was about $4.00. So if you can find an old tent pole you can make one for under $25. Considering I spent over $250 on my hennesy I am pretty happy with this DIY project, and even happier to share it with all of you.
Enjoy!!!”
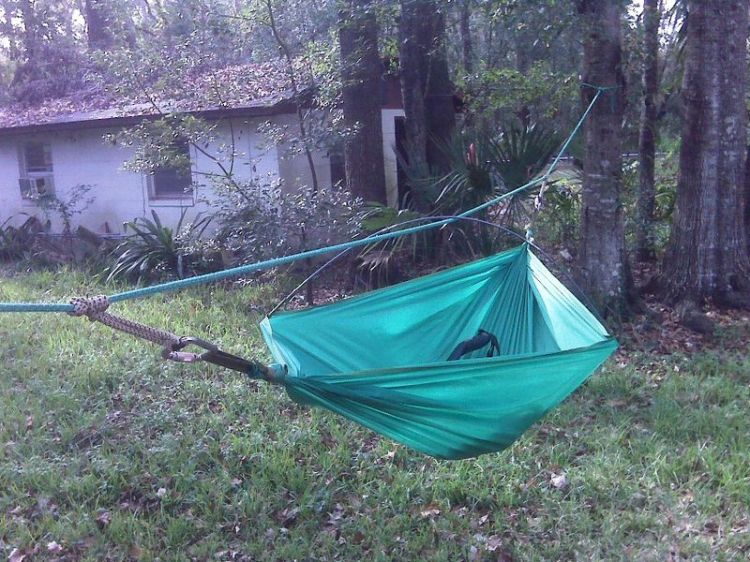
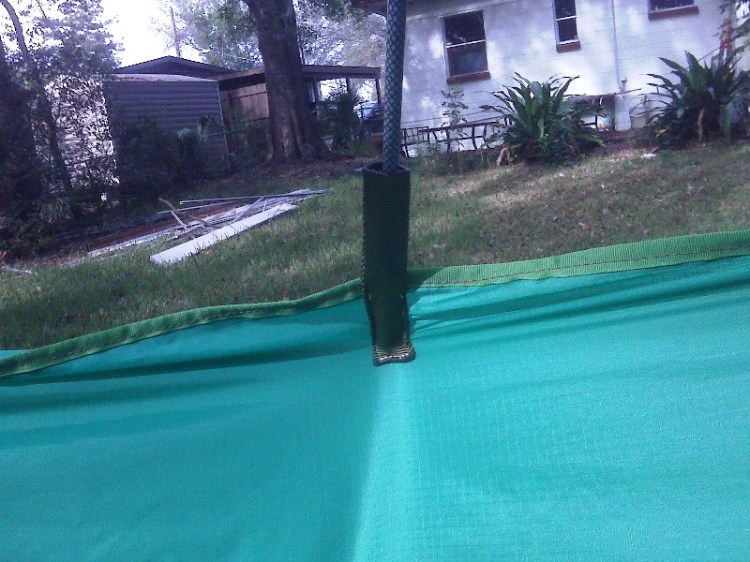
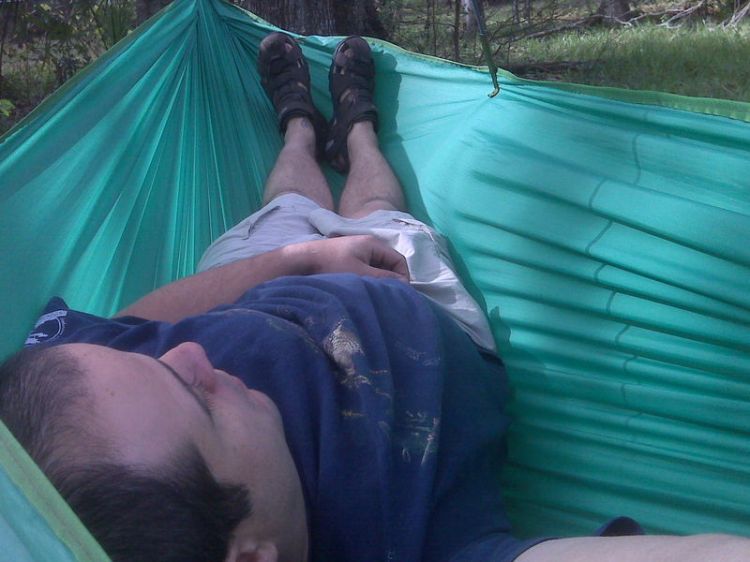
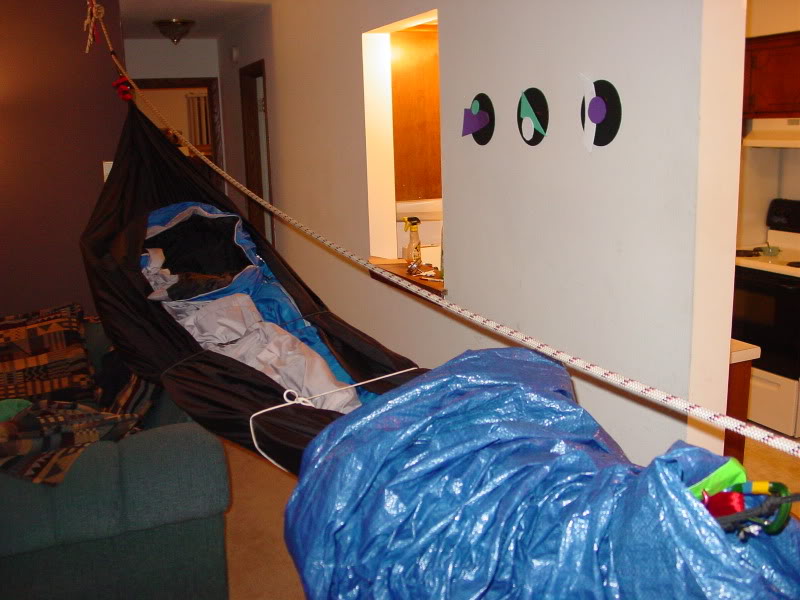
The following picture shows my version of Hunabku’s hammock. I did nothing to the edges (he suggests sewing them) and I did not use a spreader pole. I built this hammock in about 15 minutes and at the time it only cost me ~$15 in materials. HOWEVER! I did make one small modification. After I gathered the end in my hand I pulled each corner out 2 or 3 inches before tying everything together. I then repeated this process on the opposite end. What this modification does is tighten the sides of the hammock which helps prevent you (and your stuff) from falling out of the hammock. You won’t be able to sit comfortably with your legs hanging over the sides but you will sleep comfortably knowing that you won’t slide out while sleeping in the canopy! I also recommend using extra wide material from Dutchwaregear.com for a more comfortable sleep:
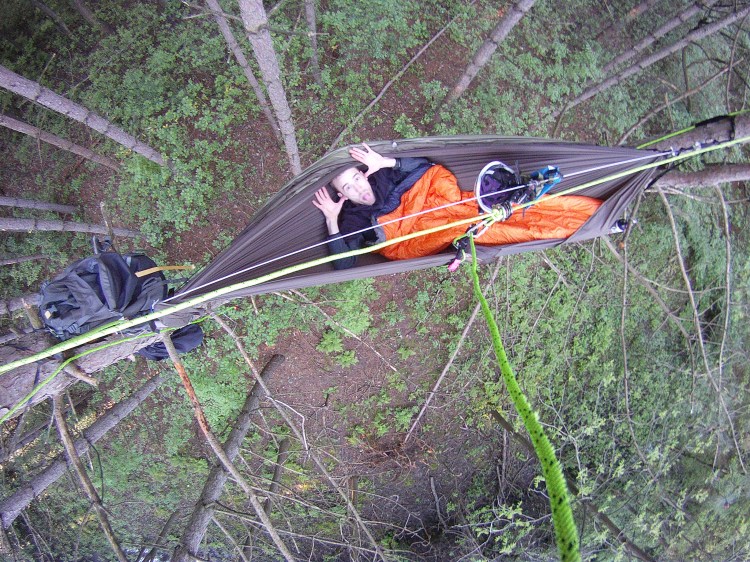
You can see more pictures of my “Hunabku” hammock being used in the following two trip reports:


.
.
.
Make Your Own Tarp
Do not ever go tree camping without rain protection. Spending the night getting soaked by rain will lead to hypothermia. Hypothermia will lead to stupid climbing decisions. Stupid climbing decisions will lead to your death. Instead, go to your local hardware store and purchase the thinnest blue poly tarp you can find. They do come in different colors, but hey, blue is the cheapest! I have been told that it is easy to find “Tyvek” sheets in home development junk piles (free!) but I have never looked myself.
The beauty of these tarps is their price! You can cut them into any shape you want without worry of messing up (I recommend cutting off the outer edge and the steel grommets to save weight, as can be seen in the picture above). And this stuff is strong, you can poke a hole anywhere along the edge, tie a small piece of accessory cord to it and have no worries that it will rip through. Also, duct tape holds perfectly to it! That means you do not need to learn how to sew! The tarp sock in the picture below was built using just ductape and some scissors.
The tarpsock above was used for winter camping only in Northern Minnesota. If you build a tarp-sock like this YOU WILL DIE unless you have multiple holes for air circulation. SERIOUSLY, YOU WILL DIE IN YOUR SLEEP IF YOU DO NOT PROPERLY VENT A TARP SOCK. Also, using a tarp sock like this in the summer will NOT work because it will just be too damn hot. I recommend just tossing a square piece of tarp over the ridgeline of your hammock and tying it to different branches. The only downside is that this stuff does not pack down well and it is very noisy in the wind.
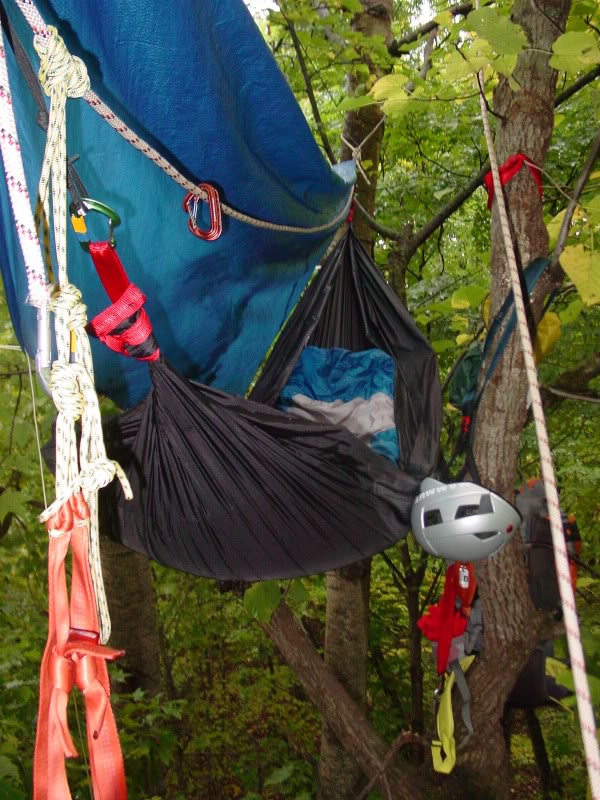
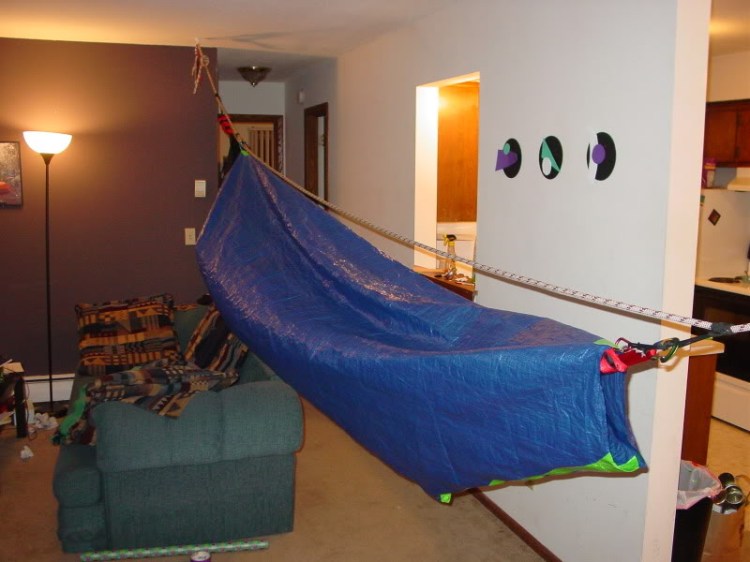
You can see more pictures of my winter tarp at this link:
.
.
.
The Cheapest Rope Ascension Technique
My current RADS (Rapid Ascent and Descent System) consists of $250 worth of gear. If I were a new tree climber that price would definitely be a deterrent. Check out this “Cheap RADS” gear list and see if it fits your budget:
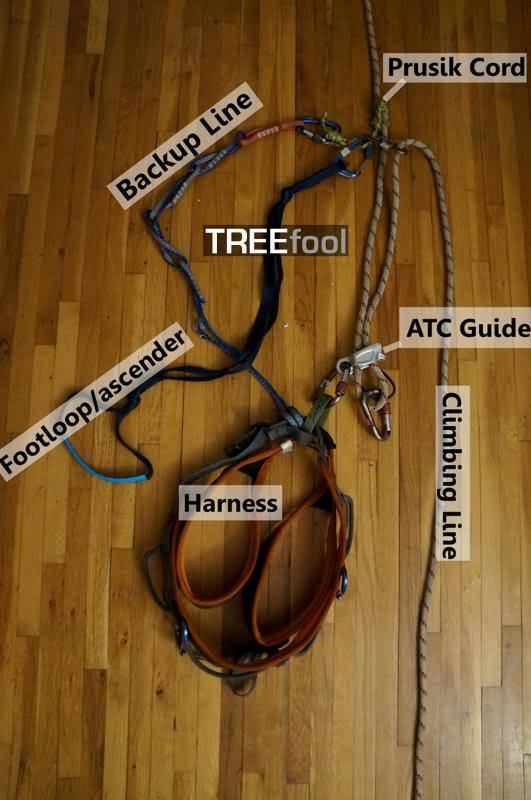
ATC Guide – $25 (or buy it used on ebay for super cheap)
Prusik loop – $1?
Sling for foot loop – $4
Sling for backup cord – $4
Three locking biners – $20
Two wire gate biners – $10?
A >4″ screw driver with handle – ?
Total = not much since you already have most of that crap anyways.
I know what you are thinking, “Why can’t I just use two prusik loops”? It is possible to ascend your climbing line with a set of prusiks but there is really no safe way to play in the canopy unless you are able to ascend and descend quickly. You can not descend quickly with prusik loops. Trust me, using a RADS setup like this is SO MUCH more enjoyable and efficient than pretty much any technique you have learned from your rock climbing days. To see a video of this setup in action check out the following link: https://treefool.com/2014/06/09/a-quick-lesson-on-branch-isolation/
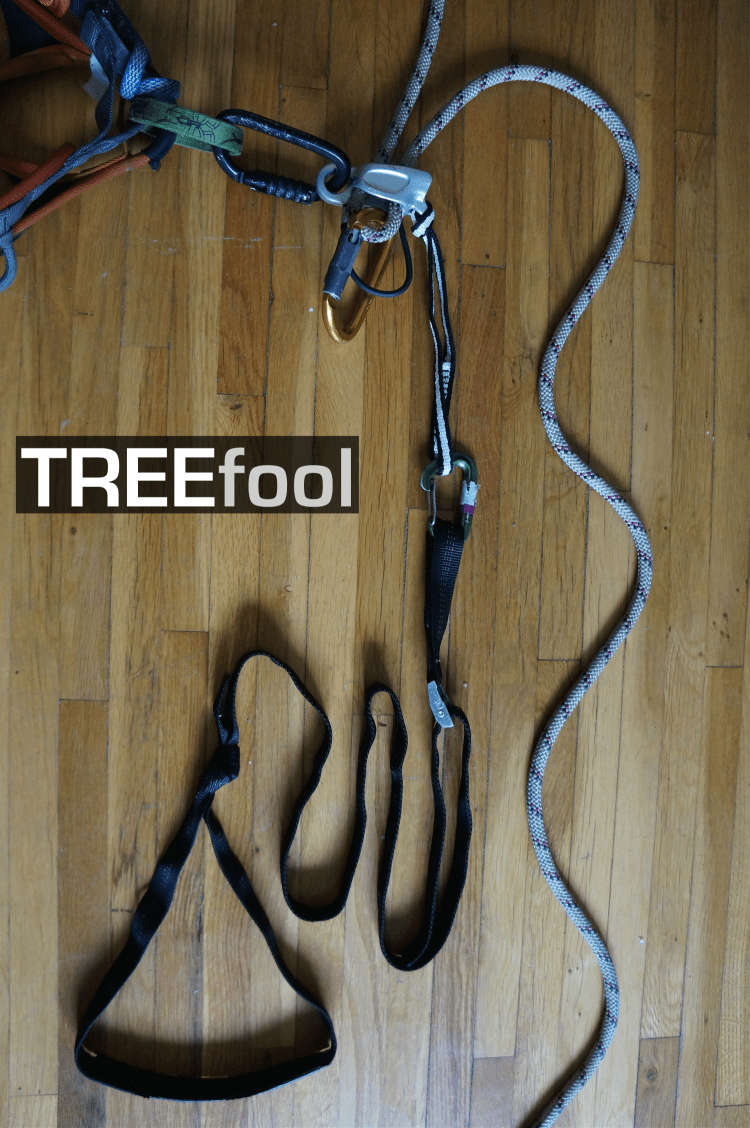
1. Clip the ATC guide to your belay loop with a locker through the “guide mode” hole.
2. Clip the rope through the atc with a second locker. The rope leading into the canopy is positioned closest to the “guide mode” hole. Your atc will now automatically lock as you pull rope through it.
3. Tie a small cord through the smaller hole on the atc (not pictured). You pull this cord when you want to descend.
4. Tie a prusik knot with a 7-8mm cord above atc (I use a klemhiest knot)
5. Clip foot loop into cord.
6. Girth hitch a runner or PAS onto your harness.
7. Clip this runner/PAS into your prusik cord as a backup should your ATC fail.
8. Clip a third biner into the prusik cord.
9. Clip the trailing end of the rope through this biner so that you can pull rope through your atc by pulling down vs pulling up.
10. Sit back in your harness and move up the prusik cord. Stand up in your footloop and simultaneously pull down on the tail end.
11. Repeat.
12. To descend simple place your screwdriver into the small hole at the front of your atc and push (or pull depending on how you clipped it to your harness) until rope starts feeding through. This requires a little bit of muscle and you should never attempt this without having your other hand holding the “brake side” of the rope.
WARNING
After playing with this setup for a few hours I realized that it is not beginner friendly. Even though I have been using an ATC Guide for many years I still had trouble controlling my descents. Make sure you practice ALOT with this set up before you climb higher than 10 feet. In the video linked above I used a dyneema sling girth hitched through the small hole instead of a screwdriver. I then clipped my foot loop into the sling and used my leg to control the descent speed. Like this:
The reason why I found this to NOT be beginner friendly is if you descend too fast and stop quickly the rope will get squeezed into the ATC so hard that you will not be able to descend. If this happens you better have the muscle AND brains to get your rope unstuck. A safer option is to use a screw driver in the hole which gives much better leverage and a much more controlled descent, like this:
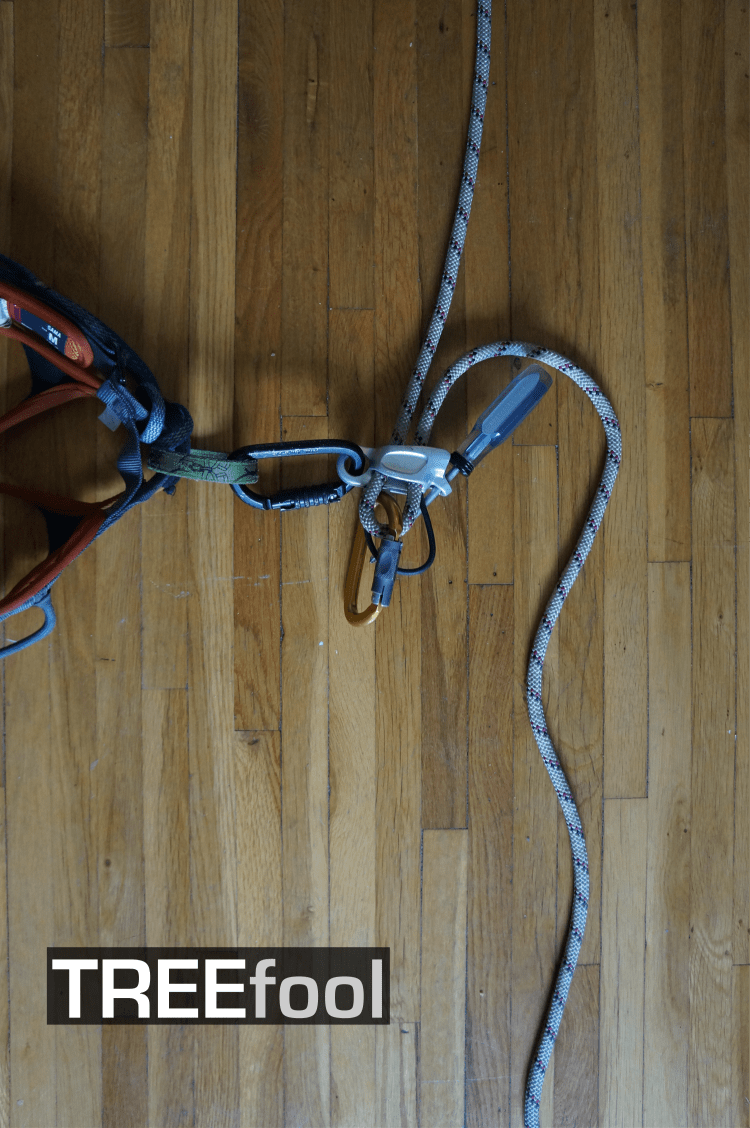
If you are using a screwdriver and drop it you can use a locking carabiner instead of a screwdriver but this will not give you as much leverage. Using a screwdriver is relatively safer. Using a sling is relatively lighter. BOTH are VERY DIFFICULT TO USE. Practice, practice, practice, educate yourself, and practice some more before using this at dangerous heights.
UPDATE! Here is a video from Chasing Cornfields that gives a great solution to the “jumpy” descents when using an ATC:
To learn MANY more climbing techniques I recommend that you visit the following link:

Climbing Gear & Techniques
.
.
.
Where To Buy Cheap Gear
#1 BUY USED GEAR! – Seriously, there is no reason to buy new gear. If it looks like I own alot of cool gear in my videos it is because I DO own a lot of cool gear. I achieve this by purchasing my gear from websites that sell “pre-loved” gear. If you think you NEED new gear, get over it. Save yourself some money and help the planet at the same time.
#2 Geartrade.com – This is an affiliate of “Backcountry.com” which allows users to sell their own used gear.
#3 Ebay.com – Ebay is well known for screwing sellers but as a buyer they will back you up 100%. If you learn how to bid smartly you can get some smashing deals on used gear.
#4 SierraTradingPost.com – Sign up for their newsletter. I can’t believe some of the coupons that they send out. Some weekends they give an EXTRA 45% off of their items which are usually already 25% off. Be warned, this website is very addicting.
#5 Craigslist.org – If you live near a city that has a large outdoor crowd you will find many very good deals assuming you know how to haggle.
Just remember, you don’t need the latest and fanciest gear to have fun. In fact, I am sure that you could reach into your closet, grab some clothes, and head out on a day hike RIGHT THIS SECOND without having any problems. Have fun and be safe!
.
Disclaimer: This article is for entertainment purposes only. If you attempt any of this you will be severely injured or die.

Keep up the awesome videos and blog. I’m hooked!
Thanks for the compliments!
Very interested in gathering the gear needed for tree climbing next spring.
Came here from the youtube page.
Great! Make sure to bring a camera because I would love to see your future setup.
Hey man, I was hoping you could possibly create a list of all the gear needed to scale a tree about 75 feet and in that list also leave links to the website you can find the gear at. I am a avid hammock camper but I have kind of hit the wall lately. I love the thrills in life and I believe this is the next thing in line for me to conquer. Thanks for your time, great videos by the way. Keep it up!
Hey thanks for the feedback. I have been making an outline for a future video series since I get asked this question ALOT. However, I haven’t considered the fact that some people may not know where to get all of the weird gear I use. I will definitely add it to my outline. Thanks! I am hoping to get the video series done before the first snowfall.
whitch fabric you used on the diy hammock?
70d ripstop nylon. Most fabric stores such as Joann Fabrics and Hancock Fabrics carry this type of material in the outdoor section.
Thank you very much for all the great information! I found your page because I am looking into an ascender set up for climbing photography- but now am very excited to try out the gear in some trees! Thank you for the inspiration and introduction to the sport!
Thank you for letting me know that this information helped you! It motivates me to continue publishing stuff like this.
I got into climbing a while ago but it is difficult to find the information i actually need. Your website and youtube account are very well organized and have useful information. I really appreciate your work.
Thank you! I like hearing that my hard work has helped another climber enjoy the outdoors!
New to climbing but really interested in taking my hammock camping to the next level! Your beginners recommendations are great. What would you change out to make it a little more expensive but more user friendly? Thank you!
Use a grigri $99 for the RADS system. Beyond that most expenses will give marginal gains.
Thanks for thhis blog post